Magento 2 Add Customer Attribute Programmatically
This article will guide you how to add customer attribute in Magento 2 programatically. Please follow our previous article to create a simple module which we will use to demo coding for this lesson and how to create the setup script classes. In this article, we will use the sample module Mageplaza_HelloWorld and the InstallDataclass.
Recommend:
Use Magento 2 Customer Attributes to adding extra attribute fields to collect valuable customer information on registration or account page.
Overview of Adding Customer Attribute Programmatically
- Step 1: Create setup file InstallData.php
- Step 2: Define the install() method
- Step 3: Create custom attribute
Step 1: Create setup file InstallData.php
Firstly, we will create the InstallData.php file:
File: app/code/Mageplaza/HelloWorld/Setup/InstallData.php
<?php
namespace Mageplaza\HelloWorld\Setup;

use Magento\Eav\Setup\EavSetup;
use Magento\Eav\Setup\EavSetupFactory;
use Magento\Framework\Setup\InstallDataInterface;
use Magento\Framework\Setup\ModuleContextInterface;
use Magento\Framework\Setup\ModuleDataSetupInterface;

class InstallData implements InstallDataInterface
{
	private $eavSetupFactory;

	public function __construct(EavSetupFactory $eavSetupFactory)
	{
		$this->eavSetupFactory = $eavSetupFactory;
	}

}
In this class, we define the EAV setup model which will be use to interact with Magento 2 attribute.
Step 2: Define the install() method
After that, we have to define the install() method and create eav setup model:
public function install(ModuleDataSetupInterface $setup, ModuleContextInterface $context)
	{
		$eavSetup = $this->eavSetupFactory->create(['setup' => $setup]);
	}
	Next, we will use eavSetup object to add attribute:
public function install(ModuleDataSetupInterface $setup, ModuleContextInterface $context)
	{
		$eavSetup = $this->eavSetupFactory->create(['setup' => $setup]);
		$eavSetup->addAttribute(
			\Magento\Customer\Model\Customer::ENTITY,
			'sample_attribute',
			[
				'type'         => 'varchar',
				'label'        => 'Sample Attribute',
				'input'        => 'text',
				'required'     => false,
				'visible'      => true,
				'user_defined' => true,
				'position'     => 999,
				'system'       => 0,
			]
		);
}
Step 3: Create custom attribute
Finally, we need to set the forms in which the attributes will be used. In this step, we need define the eavConfig object which allow us to call the attribute back and set the data for it. And the full code to create customer attribute is:
File: app/code/Mageplaza/HelloWorld/Setup/InstallData.php
<?php

namespace Mageplaza\HelloWorld\Setup;

use Magento\Eav\Setup\EavSetup;
use Magento\Eav\Setup\EavSetupFactory;
use Magento\Framework\Setup\InstallDataInterface;
use Magento\Framework\Setup\ModuleContextInterface;
use Magento\Framework\Setup\ModuleDataSetupInterface;
use Magento\Eav\Model\Config;
use Magento\Customer\Model\Customer;

class InstallData implements InstallDataInterface
{
	private $eavSetupFactory;

	public function __construct(EavSetupFactory $eavSetupFactory, Config $eavConfig)
	{
		$this->eavSetupFactory = $eavSetupFactory;
		$this->eavConfig       = $eavConfig;
	}

	public function install(ModuleDataSetupInterface $setup, ModuleContextInterface $context)
	{
		$eavSetup = $this->eavSetupFactory->create(['setup' => $setup]);
		$eavSetup->addAttribute(
			\Magento\Customer\Model\Customer::ENTITY,
			'sample_attribute',
			[
				'type'         => 'varchar',
				'label'        => 'Sample Attribute',
				'input'        => 'text',
				'required'     => false,
				'visible'      => true,
				'user_defined' => true,
				'position'     => 999,
				'system'       => 0,
			]
		);
		$sampleAttribute = $this->eavConfig->getAttribute(Customer::ENTITY, 'sample_attribute');

		// more used_in_forms ['adminhtml_checkout','adminhtml_customer','adminhtml_customer_address','customer_account_edit','customer_address_edit','customer_register_address']
		$sampleAttribute->setData(
			'used_in_forms',
			['adminhtml_customer']

		);
		$sampleAttribute->save();
	}
}
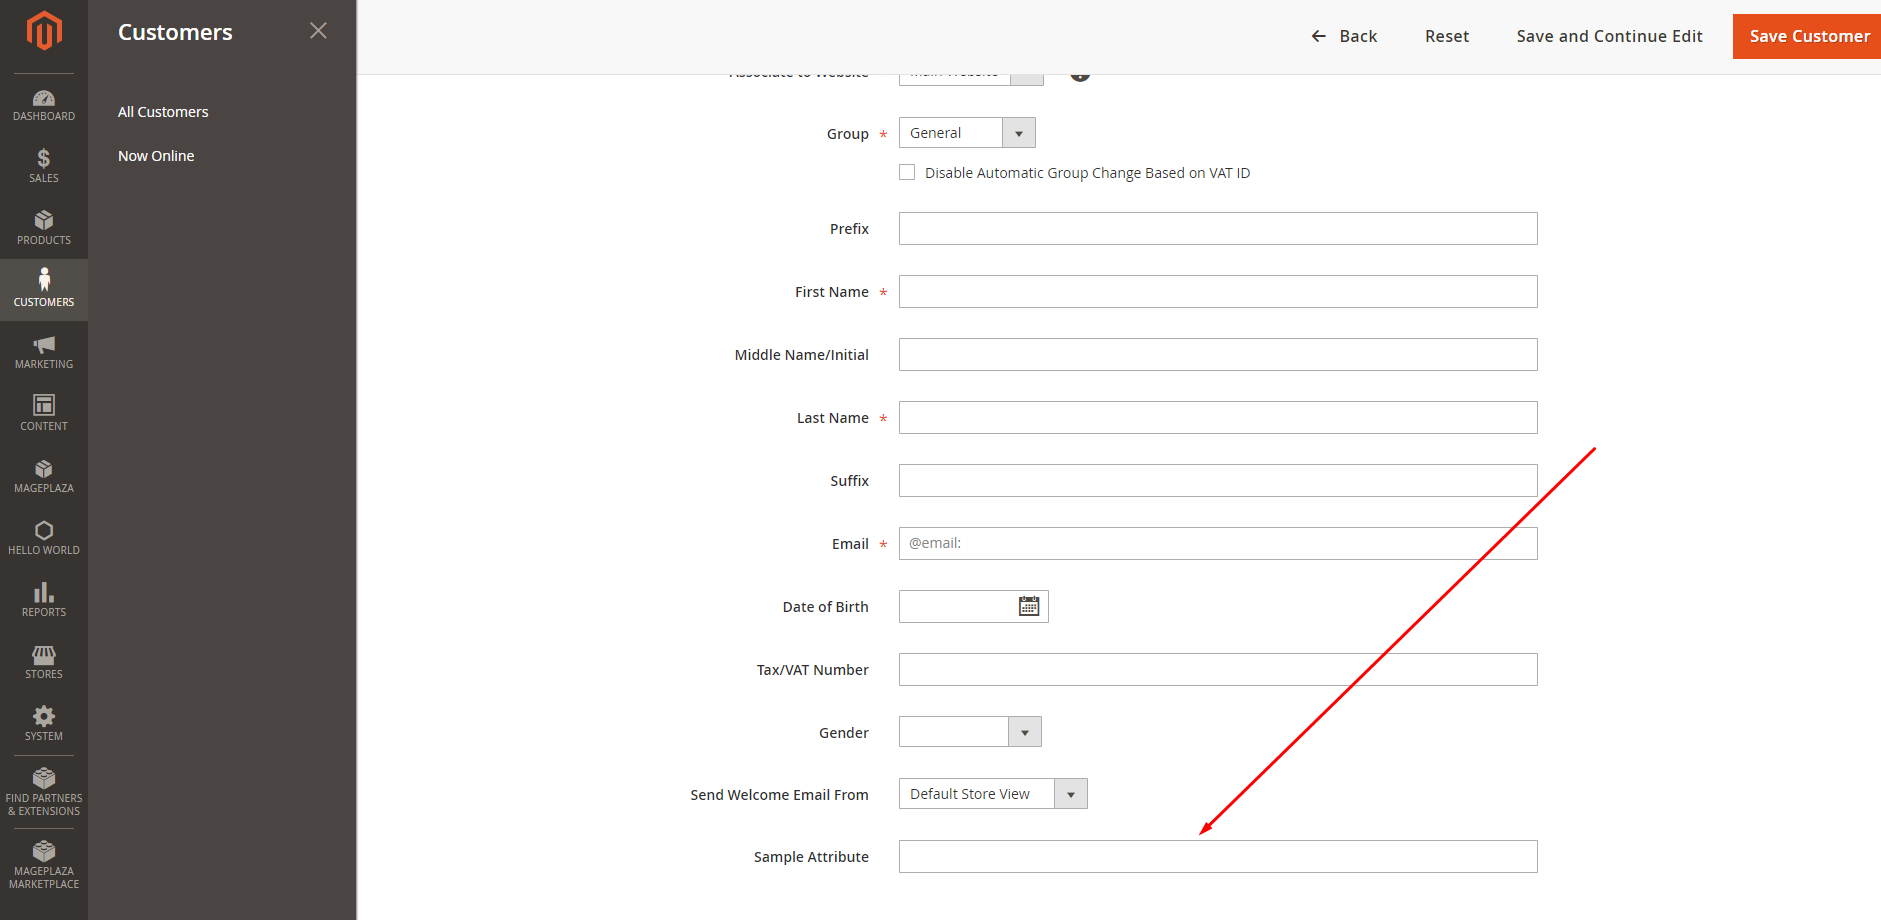
Now, let run comman line to install the module: php magento setup:upgrade and php bin/magento setup:static-content:deploy Then check the result. It will show like this:

Explore Magento 2 Customer Attributes
Related Topics
Enjoyed the tutorial? Spread it to your friends!

Sam Thomas
CEO and Founder of Mageplaza. Pursueing a simple and healthy lifestyle. A friend, a husband and a dad of two children, a trainer and an influencer wannabe. He is a big fan of sports and travel, also.
Featured Extensions


People also searched for
- Magento 2 Add Customer Attribute
- Magento 2 Add Customer
- Magento 2 Add Customer Attribute Programmatically
- magento 2 add customer attributes extension
- magento 2 add customer attribute
- magento 2 add custom attribute checkout
- magento 2 how to add customer attribute
- magento 2 add custom image attribute to product
- add customer attribute in magento 2
- magento 2 add custom attribute to module
- magento 2 add multi select attribute
- magento 2 add attribute module
- magento 2 customer add new attribute
- magento 2 add custom attribute to product programmatically
- 2.2.x, 2.3.x, 2.4.x
