
Sticky Header Component in Magento 2
Sticky Header Component allows keeping Header on the fixed-top during the scrolling by the user. That is supported by Sticky, one of the popular effects you can set for the header in your website.
This is a tutorial about how to add sticky header component in Magento 2.
So what is sticky header component in Magento 2?
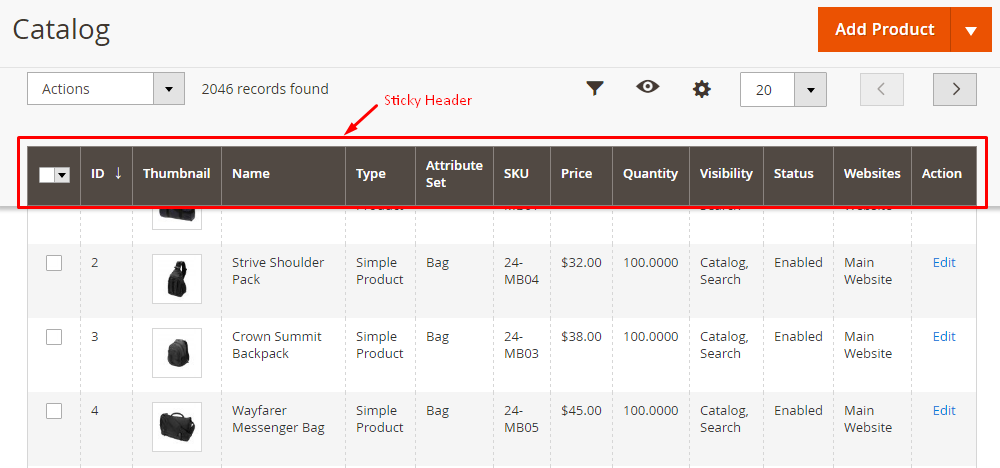
The sticky header component is a fixed area on the header section of the webpage when users scroll down the page.
Sticky Header Component allows keeping Header on the fixed-top during the scrolling by the user. That is supported by Sticky, one of the popular effects you can set for the header in your website. With the sticky header component, it is easier for better tracking. It’s also convenient for customers because they can add any product to the cart even when they are scrolling down the product page to view product details. Specifically, as you go to the product management workplace, you will see the sticky header component:
So how is the sticky header component created in Magento 2?
Magento 2 Sticky Header Component
- The sticky is applied for the display of the grid with the configuration:
<container name="sticky">
   <argument name="data" xsi:type="array">
       <item name="config" xsi:type="array">
           <item name="component" xsi:type="string">Magento_Ui/js/grid/sticky/sticky</item>
           <item name="toolbarProvider" xsi:type="string">...</item>
           <item name="listingProvider" xsi:type="string">...</item>
       </item>
   </argument>
</container>
- You can open the CMS page grid
vendor\magento\module-cms\view\adminhtml\ui_component\cms_page_listing.xmlto get more details
<container name="sticky">
   <argument name="data" xsi:type="array">
       <item name="config" xsi:type="array">
           <item name="component" xsi:type="string">Magento_Ui/js/grid/sticky/sticky</item>
           <item name="toolbarProvider" xsi:type="string">cms_page_listing.cms_page_listing.listing_top</item>
           <item name="listingProvider" xsi:type="string">cms_page_listing.cms_page_listing.cms_page_columns</item>
       </item>
   </argument>
</container>
- To change the template of the sticky header, you can use the following configuration:
<container name="listing_top">
   <argument name="data" xsi:type="array">
       <item name="config" xsi:type="array">
           <item name="template" xsi:type="string">ui/grid/toolbar</item>
           <item name="stickyTmpl" xsi:type="string">ui/grid/sticky/toolbar</item>
       </item>
   </argument>
</container>
By using the above settings, you will be able to activate the sticky header component on your Magento 2 site. Thanks for your reading!
Related Post
Conclusion
Follow this tutorial to add sticky header component in Magento 2. If you have any issue while following this tutorial or want to discuss more this topic, feel free to leave your opinion in the comments.
Thank you for reading!

Enjoyed the tutorial? Spread it to your friends!

Sam Thomas
CEO and Founder of Mageplaza. Pursueing a simple and healthy lifestyle. A friend, a husband and a dad of two children, a trainer and an influencer wannabe. He is a big fan of sports and travel, also.
Featured Extensions


People also searched for
- magento 2 sticky header component
- fixed header magento 2
- magento 2 fixed header
- sticky header magento 2
- Sticky Header Component in Magento 2
- 2.2.x, 2.3.x, 2.4.x