Integrate Close.io with Magento 2
Close.io is a useful CRM platform which helps startups and SMBs close more deals quickly and professionally. Close.io offers all the features you need to manage your workflow effectively, communicate with customers, and track every touchpoint. To help Magento 2 stores take advantages of Close.io, Mageplaza develops Webhook extension which allows Close.io to integrate with Magento 2 easily.
What Is Webhook?
Webhook is a helpful tool which allows online stores to configure to send an API request to a configurable destination (URL) such as other servers or applications in cases trigger events including new order, customer login, abandoned carts, etc occur. As a result, store owners can instantly update important notifications and have suitable activities shortly.
Table of Content
- What Is Webhook?
- About Close CRM
- How To Integrate Close CRM With Magento 2 With Webhook
- The Result Shown In Close CRM
- Conclusion
These entities of Magento which Webhook supports:
- Customer
- Order
- Invoice
- Shipment
- Credit Memo
- Product
- Category
- Abandoned Cart
These entities which Close CRM supports:
- Leads
- Contacts
- Activities
- opportunities
- Tasks
- Memberships
- Users
- Organizations
- Roles
- Custom Fields
- Lead Statuses
- Opportunity Statuses
- Reporting
- Email Templates
- Email Sequences
- Dialer
- Smart Views
- Bulk Actions
- Integration Links
- Exports
- Phone Numbers
- Event Logs
- Webhook Subscriptions
How To Integrate Close CRM With Magento 2 With Webhook
Instructions For Registering And Using Close CRM
Instructions For Registering Close CRM
Access to here, click the TRY CLOSE button on the right corner of the screen.
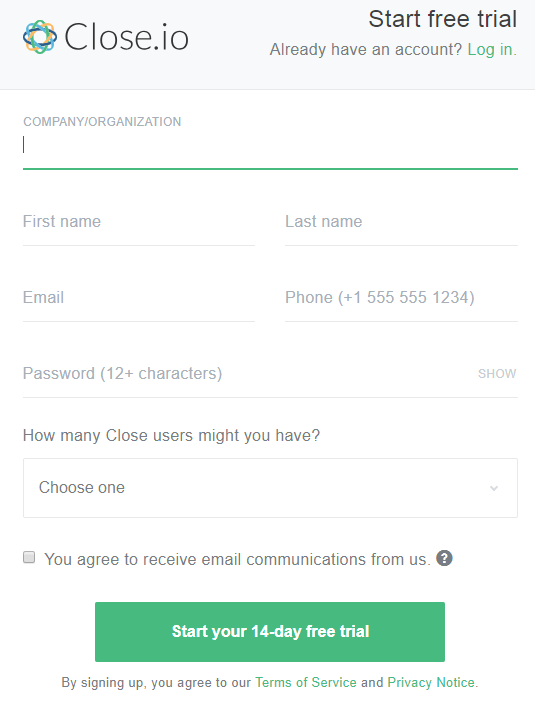
Fill information in this above form.
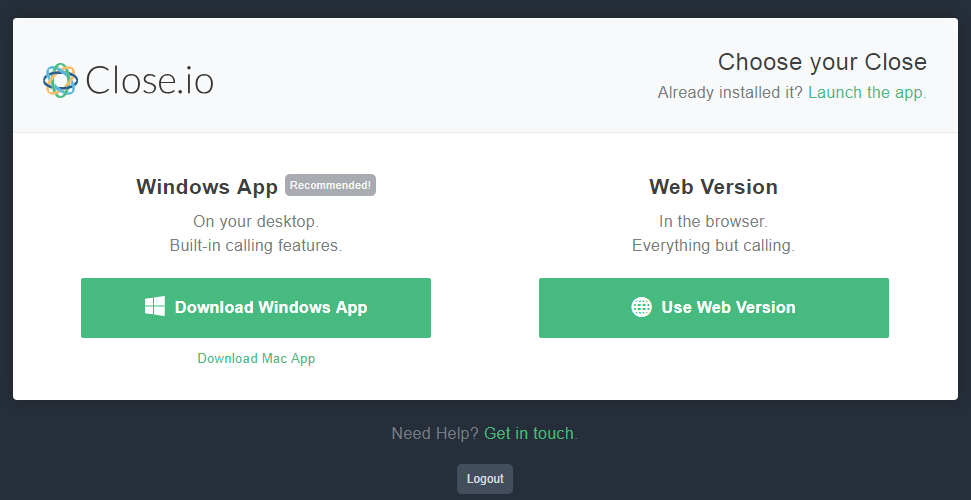
Choose to use your Close.io as Windows App or Web Version to complete your Close.io registration.
Instructions For Identifying API Keys
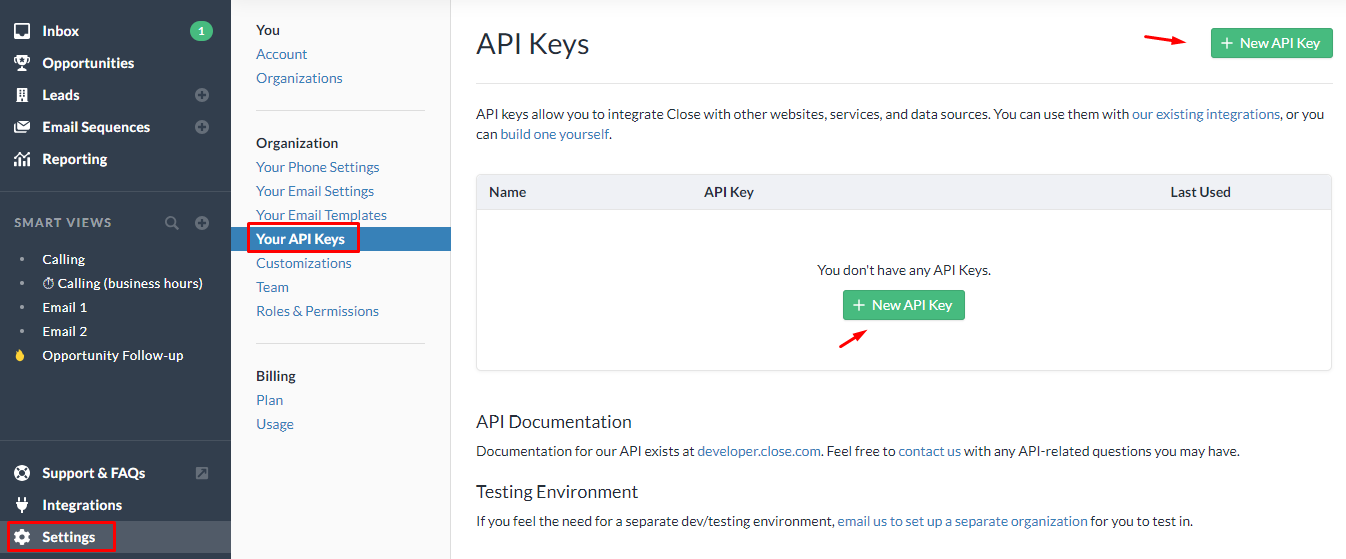
From the slide bar on the left of the screen, choose Setting > Your API Keys > Click New API Key
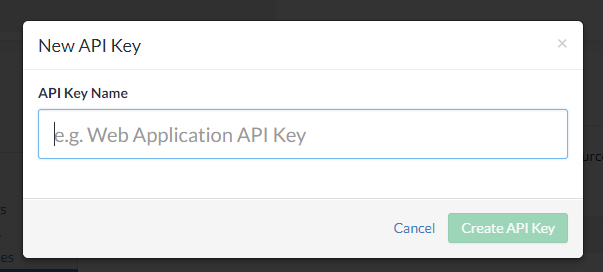
Choose the name for your API Key > Click the Create API Key button
The system will show your API Key
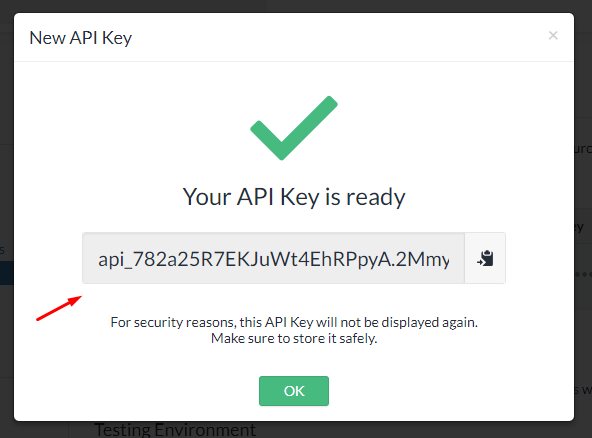
Note: This API Key will not be shown again after you click the OK button.
These Fields Of Close CRM
To view the latest fields of Close.io, you can click here.
Instructions For Creating Hook
How to create a new contact in Close CRM via Magento 2
In this part, I will give detail instructions on how to configure Webhook which helps Magento 2 integrate with Close CRM.
From the Admin Panel, go to System > Webhook > Manage Hooks, select Add New on the right corner, then you will see many options including New Order, New Customer, Update Customer, Delete Customer, etc.
Step 1: Fill all information in the General Information tab
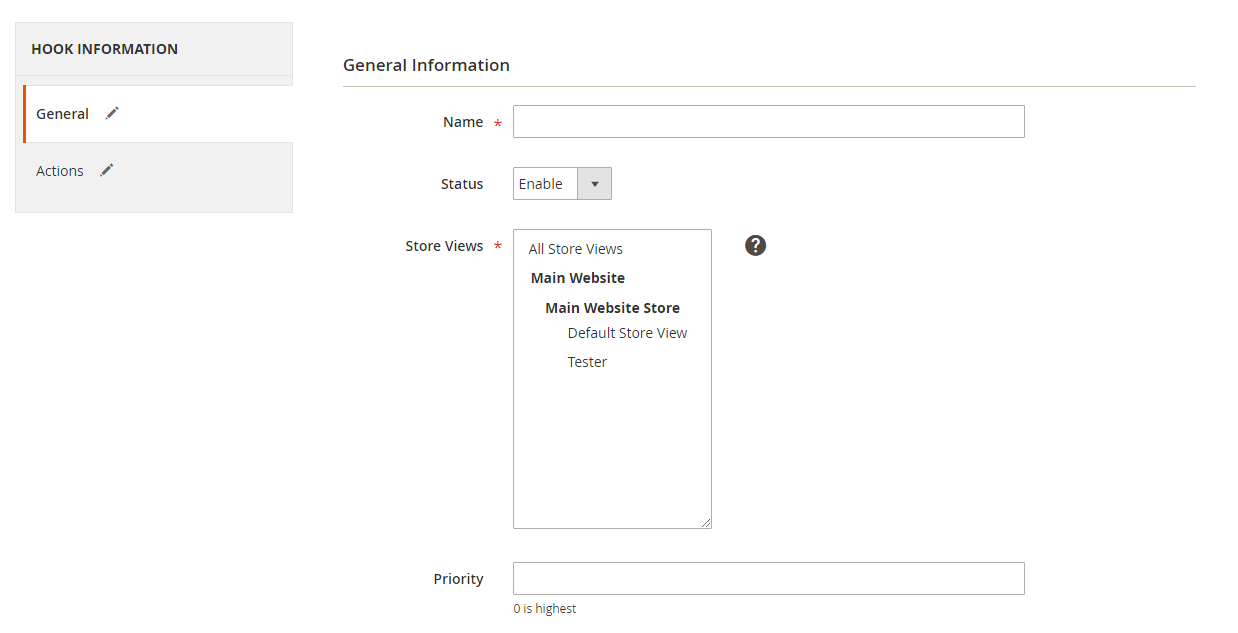
Step 2: Enter the data on the Action tab
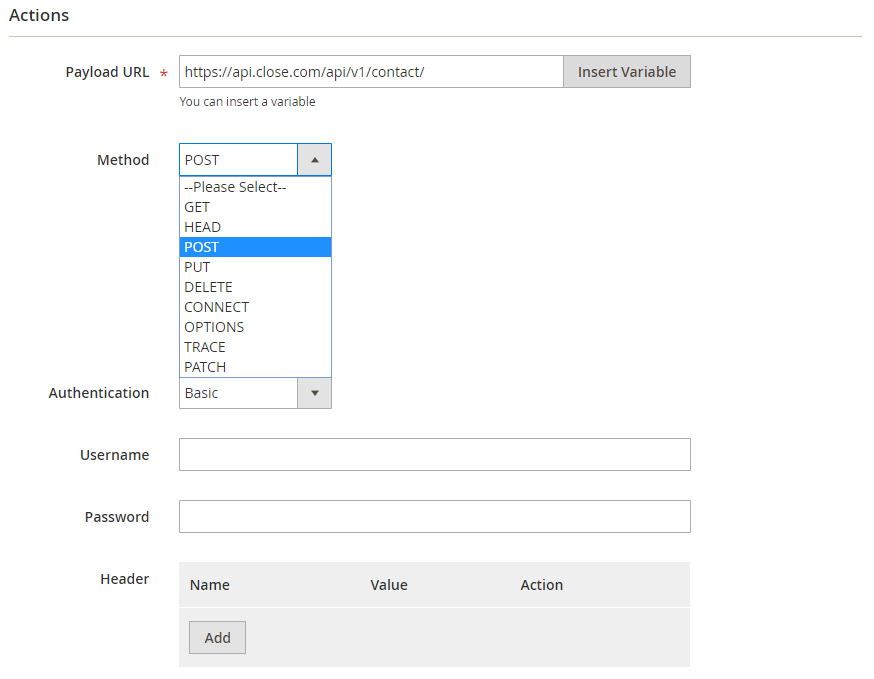
Notes:
- Payload URL: With the POST method: https://api.close.com/api/v1/contact/
- Authentication: Basic
- Username: your API Key which is created accordingly to the above instruction.
- Password: left blank
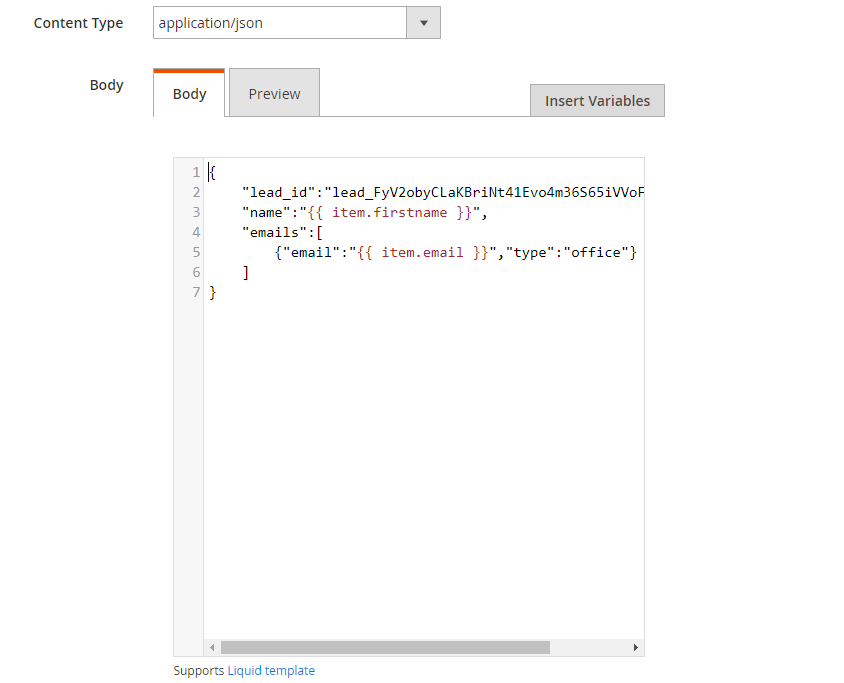
- Content Type: application/json
- Body: With POST and PUT method, you need to insert the body part For example, if you want new contact will come up compatibly when there is a new customer in Magento 2, you need to insert the below body part:
{
    "lead_id":"{your lead id}",
    "name":"",
    "emails":[
        {"email":"","type":"office"}
    ]
}
Note: If you want to get any data field, you need to change the value of this data field with variable coming from Insert Variable. With the data field “lead_id”:”{your lead id}”, you can find the lead id by selecting Lead from the slide bar > Click on the line containing lead which you want to save the contact.
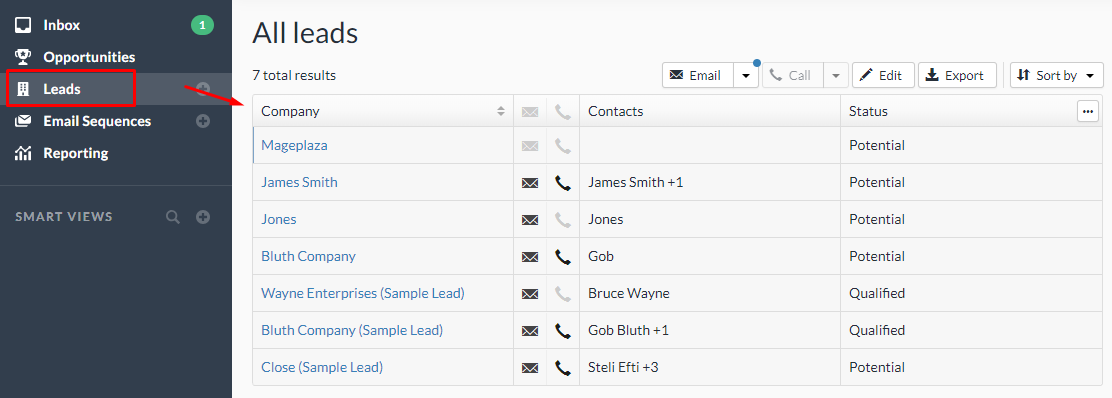
You will see the lead id which is shown on the URL, as below:

The result of creating a hook:

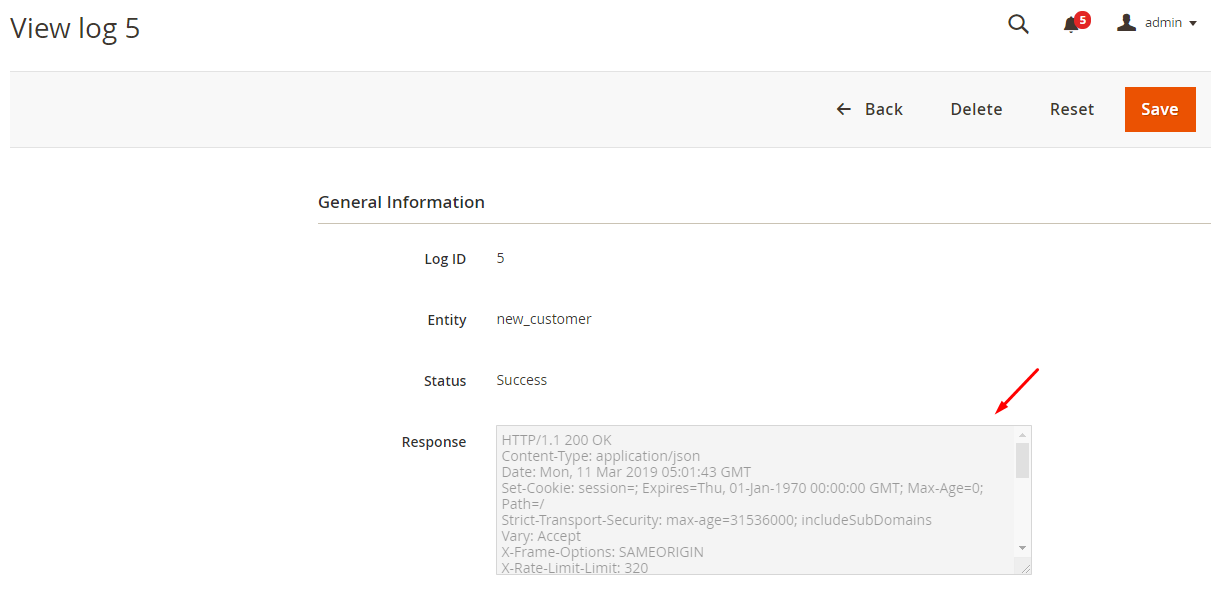
Once Magento 2 store admin adds new_customer in Magento 2, the data will be saved on Hook Logs

Click Select > View to redirect to View log page where you can view the data information.
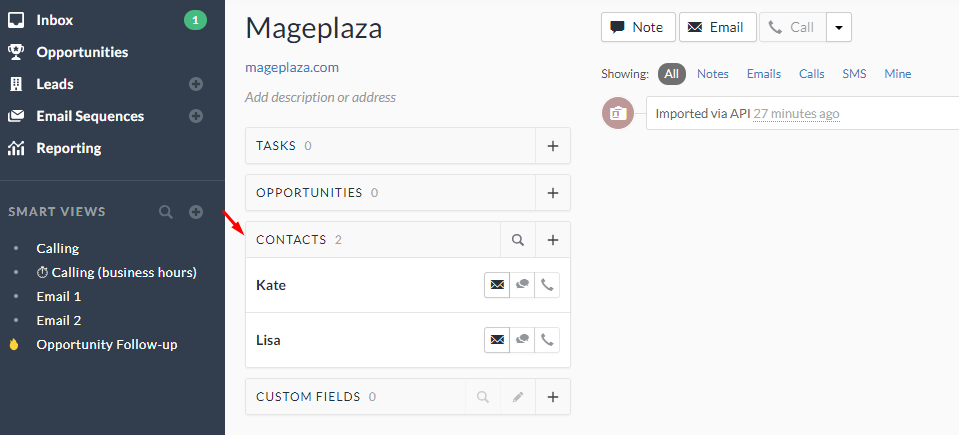
The Result Shown In Close CRM:
Conclusion
In this tutorial, we introduce how to register Close CRM, create Hook with Mageplaza Webhook Magento2, and integrate Capsule CRM with Magento 2 via Webhook. In addition, you can refer to other useful extensions for your store.
Back Ask Mageplaza