
How to Configure PayPal Express Checkout Payment Method in Magento 2
With a big catalog of 234+ extensions for your online store
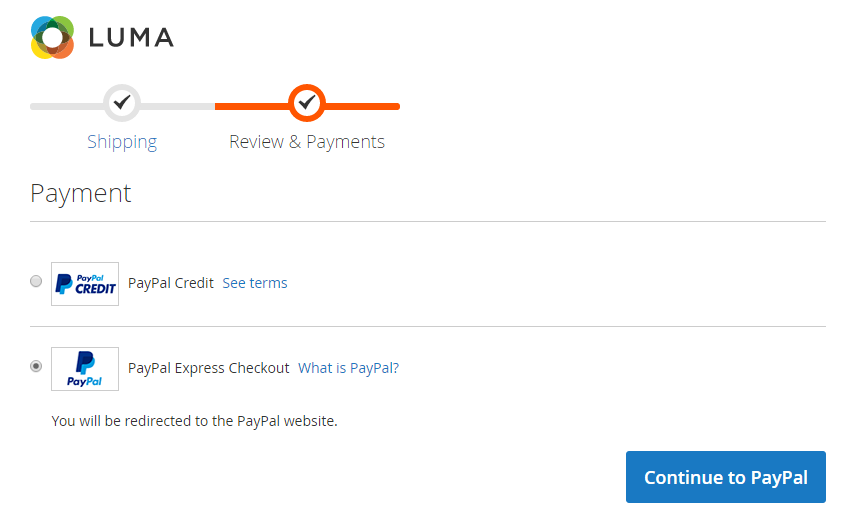
PayPal Express Checkout Payment Method is the most convenient payment method on the internet nowadays. It is confirmed that integrating PayPal on your store can increase conversion rate twice and raise the overall customers up to 29%. PayPal is trusted and used widely for its fast checkout; utility when accepting debit card, credit card and almost currencies in the world; as well as absolute security. For all the reasons above, PayPal Express Checkout appear on every online store. To manage PayPal Express Checkout Payment Method on your Magento website, let’s follow the steps below.
Read How to Create Payment Methods in Magento 2
5 Steps to Configure PayPal Express Checkout Payment Method in Magento 2
- Step 1: Prepare PayPal Account
- Step 2: Prepare for PayPal Express Checkout Configuration
- Step 3: Set options for Required Settings
- Step 4: Set options for Basic Settings
- Step 5: Set options for Advanced Setting
Step 1: Prepare PayPal Account
Before integrating PayPal to your store, you should configure your PayPal account to take the information of your PayPal account ID, your email address, your API username, your API password, and your API signature.
- First thing overall is working with merchant account:
- Go to manager.paypal.com and log in to your account or sign up for a new merchant account.
- Click
Service Settings > Hosted Checkout Pages > Set Up, then set AVS field to “No”, CSC field to “No” and Enable Secure Token to “Yes”. - Click
Save. - Next, you will be recommended to add another user to your account. Then,
- Log into your account again in man ager.paypal.com.
- Follow PayPal guidance to get an additional user.
- Click
Save. - Click on Required PayPal Settings and set the options for the section.
- In the Email Address field, type the exact email which is used to sign up your PayPal merchant account.
- In the API Authentication Methods field, select “API Signature” or “API Certificate”.
- Credentials from PayPal is an optional section, complete it if needed.
- Set Sandbox Mode to “Yes” in case you are using credentials from your sandbox account. Then, click Sandbox Credentials and follow the instructions to set up your testing environment if needed.
- If your system uses a proxy server to establish the connection between Magento and the PayPal payment system, set API Uses Proxy to “Yes” and complete the Proxy Host and Proxy Port fields.
- After finishing all sections above, set Enable this Solution to “Yes”.
- If you want to offer financing through PayPal to your customers, go to PayPal Credit to learn more. As the Basic and Advanced Settings can be configured later, click
Save configand start to work with the Magento site.
Step 2: Prepare for PayPal Express Checkout Configuration
This step is used to build a basement for configuring PayPal Express Checkout.
- On the Admin sidebar, choose
Stores > Settings > Configuration. - In the panel on the left, click
Sales > Payment Methods. - If you install multiple websites, stores or views, choose Store View in the upper-left corner where the configuration applies.
- Click
Merchant Locationand set your country to Merchant Country field. If this field is left blank, Default Country from General Config will be used. - Choose PayPal All-In-One Payment Solutions or PayPal Express Checkout to click
Configure.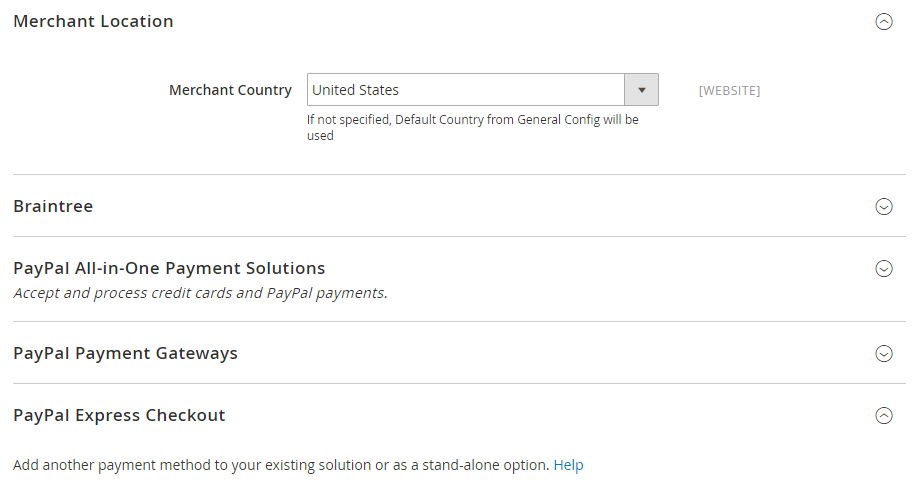
Step 3: Set options for Required Settings
In Magento 2, you can choose to use PayPal Express Checkout or PayPal All-In-One solution. Once you configure a solution, the other is automatically deactivated. Both PayPal Express Checkout and PayPal All-In-One solution have three part of setting: Required settings, Basic settings and Advanced settings, therefore the guidance below only consists of the PayPal Express Checkout.
-
Expand the Required PayPal Settings then Express Checkout section.
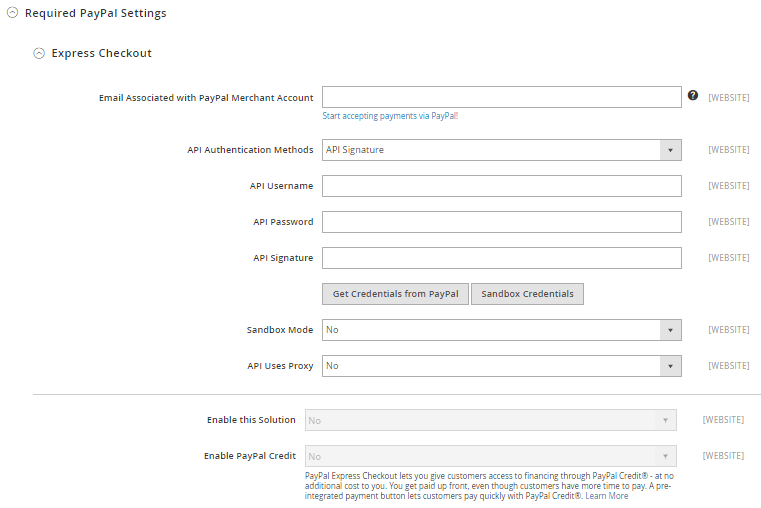
- In the Email Associated with PayPal Merchant Account field, enter the exact mail that is specified in your merchant PayPal account.
- In the API Authentication Methods field, select one of the following:
- “API Signature” and fill the API Username, API Password and API Signature fields.
- “API Certificate” and fill the API Username and API Password fields. In the API Certificate field, upload a file of API Certificate to complete.
- Click
Get Credentials from PayPalorSandbox Credentialsif needed, a link to PayPal will be opened in a new window. You should log in and follow the instructions. - If your system uses a proxy server to connect Magento with the PayPal payment system, set API Uses Proxy to “Yes” then complete the Proxy Host and Proxy Port fields.
- In the Enable This Solution field, choose “Yes” to activate PayPal Express Checkout.
- In the Enable PayPal Credit field, select “Yes” to accept PayPal Credit on your store.
- Expand the Advertise PayPal Credit section.
- Click
Get Publisher ID from PayPaland take your account ID information then fill in the Publisher ID field. - Expand the Home Page section and set the options.
- In the Display field, choose “Yes” to enable the banner to appear on the Home Page or “No” to disable it.
- In the Position field, select the location of the banner on Home Page.
- In the Size field, set the size of the banner to be suitable with your store.
- Do the same for the Catalog Category Page, Catalog Product Page, and Checkout Cart Page sections.
Step 4: Set options for Basic Settings
You will start to configure how PayPal Express Checkout displays in this step.
- Click to expand the Basic Settings section.
- In the Title field, enter a new title or leave it in default of “PayPal Express Checkout”.
- In the Sort Order field, enter a number to determine the position of PayPal Express Checkout Payment in the list of payment methods that is shown in the checkout page (start from 0).
- In the Payment Action field, set to one of the following:
- “Authorization” to approve the purchase, but puts a hold on the funds to waiting for being “captured” by the merchant.
- “Sale” to imply that the purchase is already authorized and can be withdrawn from the customer’s account at once.
- “Order” to show that the order is neither authorized nor captured. When “Order” is chosen, there are three more fields to complete. Note that, to change any default data in these fields, you need to contact PayPal.
- In the Display on Product Details Page field, select “Yes” to To display the
Checkout with PayPalbutton on the product page.
Step 5: Set options for Advanced Settings.
The advanced settings section includes of advanced configuration when integrating PayPal.
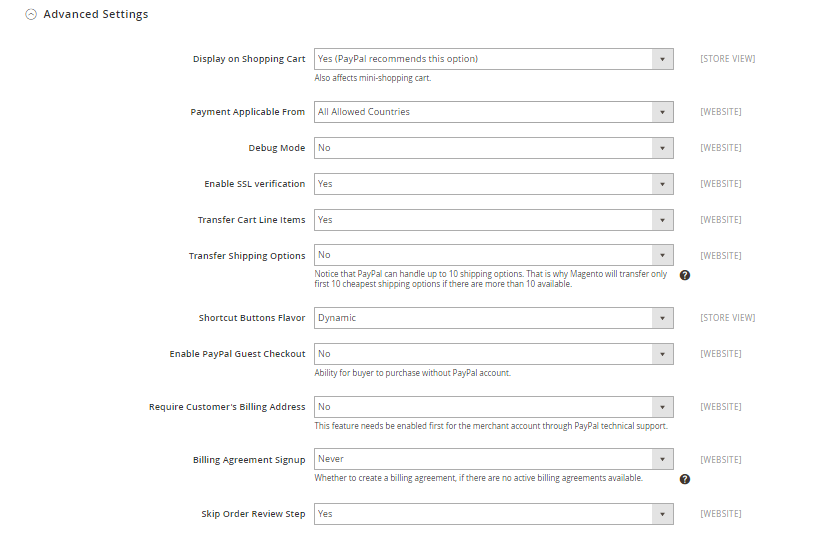
- Click to expand the Advanced Settings section.
- In the Display on Shopping Cart field, choose “Yes” to display the
Checkout with PayPalbutton in the shopping cart. - In the Payment Applicable From field, choose “All Allowed Countries” to accept PayPal Express Checkout for customers from all countries specified in your store configuration or “Specific Countries” to approved this payment method for some definite countries which you select from the Payment from Countries Payment Applicable From list.
- In the Debug Modefield, set “Yes” to write communications with the payment system into the log file. The log file for PayPal Payments Advanced is
payments_payflow_advanced.log. - Set Enable SSL Verification field to “Yes” to enable host authenticity verification.
- Set Enable SSL Verification to “Yes” to enable host authenticity verification.
- Set Transfer Cart Line Items to “Yes” to display a full summary of the customer’s order by line item from the PayPal site then set Transfer Shipping Options to “Yes” to include up to ten shipping options in the summary.
- In the Shortcut Buttons Flavor field, to determine the type of image used for the PayPal acceptance button, choose “Dynamic” to display an image that can be dynamically changed from the PayPal server or choose “Static” to display a specific image that cannot be dynamically changed.
- Set Enable PayPal Guest Checkout to “Yes” to allow customers without PayPal accounts to make purchases with this method.
- In the Require Customer’s Billing Address field, choose “Yes” to require the customer’s billing address for all purchases; choose “No” to exclude the requirement or choose “For Virtual Quotes Only” to require the customer’s billing address for virtual quotes only.
- In the Billing Agreement Signup field, set “Auto” to allow your customers to sign a billing agreement during the Express Checkout flow or use another method of payment; set “Ask Customer” to allow your customers to decide whether to sign a billing agreement during the Express Checkout flow or set “Never” to disable signing a billing agreement during the Express Checkout flow.
-
Set Skip Order Review Step to “Yes” to let the customer complete the transaction from the PayPal site without returning to your Magento store for Order Review.
- Now you generally complete the Advanced Settings. Click
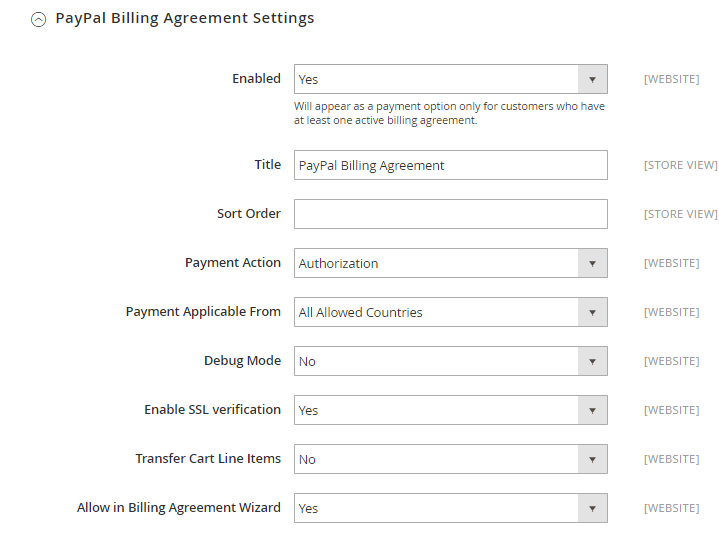
Save Configto save the process or continue with three more sections below if necessary for your store. - Expand PayPal Billing Agreement Settings to configure Billing Agreement for customers who have already entered into a billing agreement with your company.
-
Set Enabled to “Yes” to activate PayPal Billing Agreement then complete the settings as same as the instruction for PayPal Express Checkout.
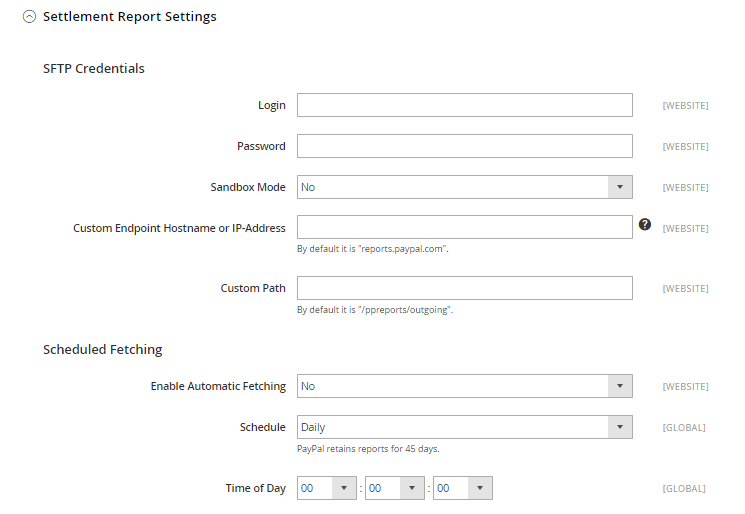
- In the Settlement Report Settings section, If you have signed up for PayPal’s Secure FTP Server, enter the SFTP login credentials in Login and Password fields.
- Set Sandbox Mode to “Yes” to run test reports before “going live” with Express Checkout on your site.
- Complete the Custom Endpoint Hostname or IP Address field. By default, the value is:
reports.paypal.com. - Complete the Custom Path field to show where reports are saved. By default, the value is:
/ppreports/outgoing. -
Under Scheduled Fetching, set Enable Automatic Fetching to “Yes” to generate reports according to a schedule and choose the frequency to generate the report in the Schedule field. Then in the Time of Day field, set the hour, minute, and second when you want the reports to be generated.
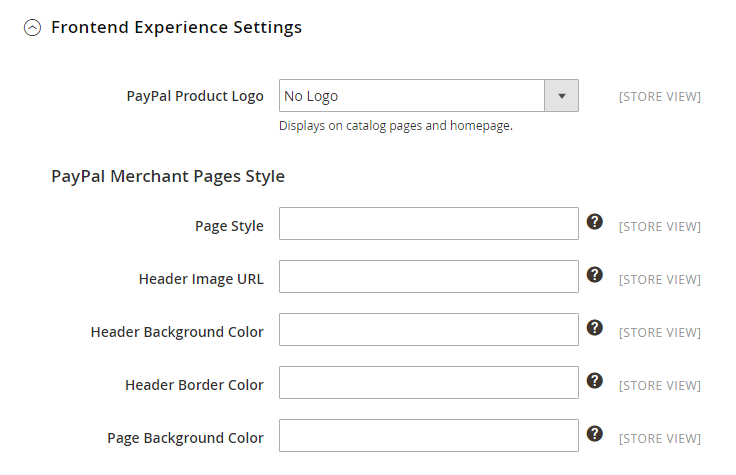
- The last section - Frontend Experience Settings, allows you to customize the appearance of your PayPal merchant pages and PayPal logos on your site.
- In the PayPal Product Logo field, choose the size of PayPal Logo to display on your catalog pages and homepage.
- In the Page Style field, enter the name of the page style that you want to apply to your PayPal merchant pages.
- In the Header Image URL field, enter the URL of the image you want to appear in the upper-left corner of the payment page. The maximum file size is 750 pixels wide by 90 pixels high.
-
In the Header Background Color, Header Border Color and Page Background Color fields, enter the six-character hexadecimal code, without the “#” symbol to complete.
- Click the
Save Configbutton in the upper-right corner when you are done.
Explore Mageplaza Payment Suite
The bottom line
When it comes to payment methods, PayPal is still a popular one due to its fast speed, high security, and multiple currency approval. If you aim at increasing conversion rates and attracting more customers, setting up PayPal Express Checkout Payment Method can be a good tactic to follow. We have included everything you have to do in this post, so don’t hesitate to start doing it now. In case you would like to install other payment options, related posts will serve your needs. And if you want something we do not have already, feel free to chat with us.
Related Posts:
Looking for
Customization & Development Services?
8+ years of experiences in e-commerce & Magento has prepared us for any challenges, so that we can lead you to your success.
Get free consultant
Recent Tutorials

Change Store Email Addresses

Fix Magento 2 'Invalid Form Key. Please refresh the page'

Magento 2 Search Settings: Default Magento vs Mageplaza AJAX Search
Explore Our Products:
People also searched for
- magento 2 paypal express checkout
- magento 2 paypal express checkout configuration
- magento 2 paypal express checkout not working
- paypal express checkout magento 2
- magento paypal express checkout
- configure paypal in magento 2
- how to configure paypal in magento 2
- magento 2 paypal integration
- magento 2 paypal setup
- magento 2 paypal configuration
- how to set up paypal express checkout
- magento 2 paypal sandbox setup
- wrong paypal express checkout token specified
- paypal express magento 2
- magento paypal setup
- magento 2 a wrong paypal express checkout token is specified
- magento paypal express
- magento paypal express checkout not working
- a wrong paypal express checkout token is specified.
- how to enable paypal express checkout
- paypal configuration in magento 2
- magento 2 remove paypal button from product page
- paypal express checkout magento
- magento 2 paypal multi currency
- magento 2 paypal we can't place the order
- magento 2 setup paypal express checkout
- magento paypal integration
- magento 2 paypal extension
- paypal magento
- magento payment action
- magento 2 paypal sandbox
- 2.2.x, 2.3.x, 2.4.x
Stay in the know
Get special offers on the latest news from Mageplaza.
Earn $10 in reward now!


