
How to Configure Authorize.Net Direct Post in Magento 2
With a big catalog of 234+ extensions for your online store
Authorize.Net Direct Post is useful for Magento website that has a plenty of stores as merchants who can totally manage their checkout pages. Particularly, merchants have the own accounts on Authorize.Net and they will complete all checkout content and forms on their sites. In fact, this will bring more security for merchant payment information as the form is posted to Authorize.Net’s secure servers. It is clearly visible that Authorize.Net Direct Post plays the role of third-party in Magento site as same as PayPal. However, with Authorize.Net, customers can finish the transaction process while remaining in Magento store, instead of being redirected to the third-party website.
Configure Authorize.Net Direct Post in Magento 2
- Step 1: Prepare for the Authorize.Net Direct Post Method
- Step 2: Set the basement
- Step 3: Complete the last configuration
Step 1: Prepare for Authorize.Net Direct Post Method
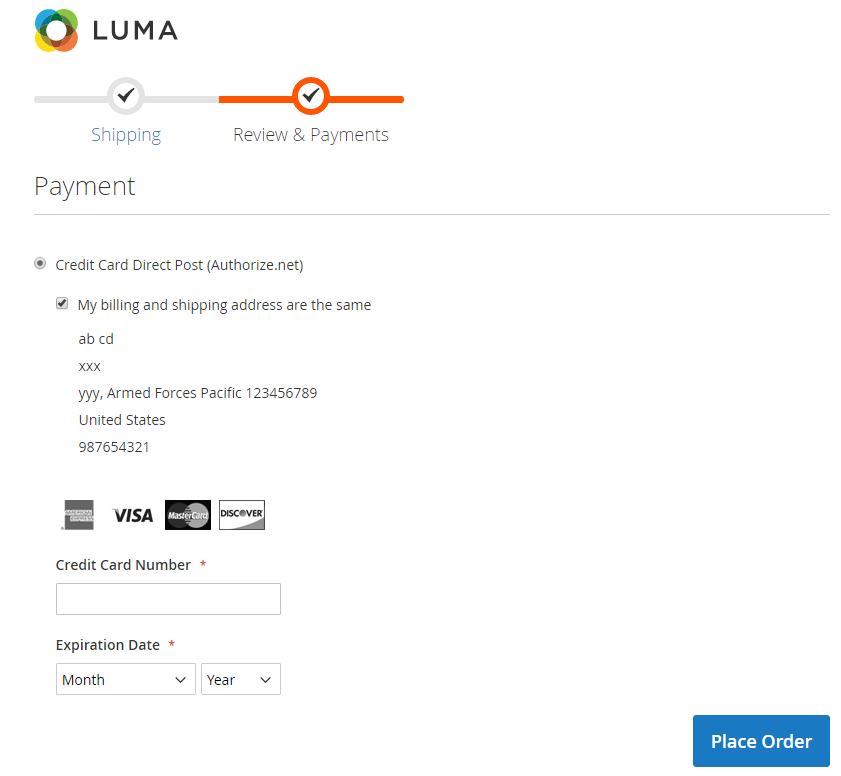
This step is about preparing the appearance of Authorize.Net Direct Post payment method to display on your checkout page. Let’s follow the instruction below.
- On the Admin sidebar, click
Stores > Settings > Configuration. - In the panel on the left, choose
Sales > Payment Methods. - Click to expand the Authorize.Net Direct Post section and set options.
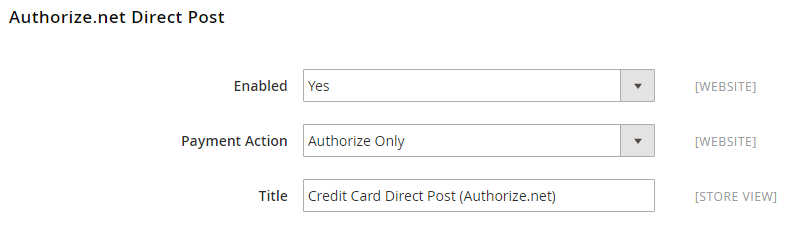
- In the Enabled field, set “Yes” to activate Authorize.Net Direct Post.
- In the Set Payment Action field, select “Authorize Only” to accept Authorize.Net to authorize customer’s funds, and create an order in your store. After the process, you can compose an invoice and capture the customer’s funds. Or select “Authorize and Capture” to let Authorize.Net authorizing and capturing customer’s funds and creates an order and invoice in your store.
- In the Title field, enter a new name for Authorize.Net Direct Post to show on the checkout page or leave the default of “Credit Card Direct Post (Authorize.net)”.
Step 2: Set the basement
Before launching the Authorize.Net Direct Post Method for your Magento store you need to set the basement which actually is the process of providing your Authorize.Net merchant account.
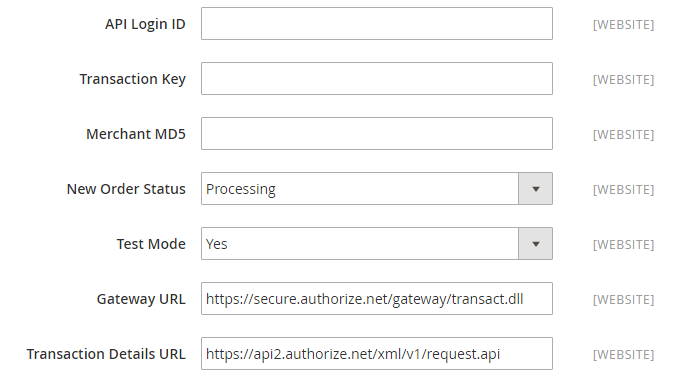
- In the API Login ID, Transaction Key and Merchant MD5 fields, enter your credentials and hash value from your Authorize.Net merchant account. You can find hash value on the Authorize.Net website at
Account > Settings > Security Settings > MD5-Hash. - In the New Order Status field, set Processed Ogone Payment or Processing to suitable with the nature of the transaction.
- Leave the Test Mode field to “Yes” to set your configuration in the test environment. When you are sure that the system runs well and there is no bug, turn Test Mode into “No” for adapting on live transaction.
- In the Gateway URL and Transaction Details URL fields, type the new URLs or leave them in the default. In case you receive a temporary URL for test transactions, remember to restore the original URL when you are ready to process live transactions.
Step 3: Complete the last configuration
This is the last step of the guidance which concludes of the common requirement for configuring payment method in Magento.
- In the Accepted Currency field, choose the currency being circulated in your location or use the one that gives your target customers the most convenience at checkout.
- Set Debug to “Yes” to save logs between your store and the Authorize.Net system.
- Set Email Customer to “Yes” if you want to send emails to customers then type your business email address in the Merchant’s Email field.
- In the Credit Card Types box, select all type of credit card that is accepted in your store.
- Set Credit Card Verification to “Yes” to require customers to enter a card verification value.
- In the Payment from Applicable Countries field, choose “All Allowed Countries” to accept Authorize.Net Direct Post for customers from all countries specified in your store configuration or “Specific Countries” to approved this payment method for some definite countries which you select from the Payment from Specific Countries list.
- In the Minimum Order Total and Maximum Order Total fields, set the order amounts required to qualify for this payment method.
- In the Sort Order field, enter a number to determine the position of Authorize.Net Direct Post in the list of payment methods that is shown during checkout (start from 0).

- Click
Save Configbutton in the upper-right corner when you are done.
Related Post
- Configure Payment Failed Email in Magento 2
- Configure Bank Transfer Payment Method
- Improve Sales Management with Custom Order Number
- Configure PayPal Express Checkout Payment Method
- Configure Purchase Order Payment Method
- A must-have tool for professional wholesalers
- How to Create Google Shopping Feed in Magento 2
Looking for
Customization & Development Services?
8+ years of experiences in e-commerce & Magento has prepared us for any challenges, so that we can lead you to your success.
Get free consultant
Recent Tutorials

Change Store Email Addresses

Fix Magento 2 'Invalid Form Key. Please refresh the page'

Magento 2 Search Settings: Default Magento vs Mageplaza AJAX Search
Explore Our Products:
People also searched for
- magento 2 authorize.net direct post not working
- magento 2 authorize.net
- authorize.net magento 2
- authorize.net direct post magento 2
- authorize.net direct post
- magento 2 authorize.net not working
- magento authorize.net setup
- how to set up authorize net in magento
- authorize.net magento
- magento authorize net
- magento authorize
- magento 2 authorize.net cim
- magento authorizenet
- magento authorize.net test mode
- authorize.net magento extension
- magento 2 authorize.net cim extension
- magento 2 authorized.net cim
- authorize.net direct post in magento
- authorize.net cim magento
- magento authorize net cim module
- authorize net cim magento
- magento authorize.net cim
- magento 2 authorize net md5
- magento 2 authorize.net patch
- authorize cim magento
- magento authorize cim
- authorize.net cim magento 2
- magento 2 authorize.net extension
- authorize.net magento 2 extension
- magento authorize and capture
- 2.2.x, 2.3.x, 2.4.x
Stay in the know
Get special offers on the latest news from Mageplaza.
Earn $10 in reward now!


